Quickstart
Welcome to MARCO docs! This guide provides step-by-step instructions on creating your first distributed app and obtaining tokens to interact with our APIs.
Prerequisites
Before diving in, ensure you have a MARCO account:
If your organization is already on MARCO, you can get an invitation through Send invitations.
If your organization is not on MARCO, you can request a demo account through our Contact page. Our team will contact you to discuss your needs and initiate the account creation process.
Once you receive the invitation, follow the registration link provided in the email from MARCO to complete the registration process.
1. Create an application
The first step involves registering your first distributed application within the MARCO platform, commonly referred to as Marpp.
To create a Marpp, follow these steps:
On MARCO Console, go to Applications > Marpps > Create application:

Set a name for the application. For example,
My first Marpp.Click Register Application.
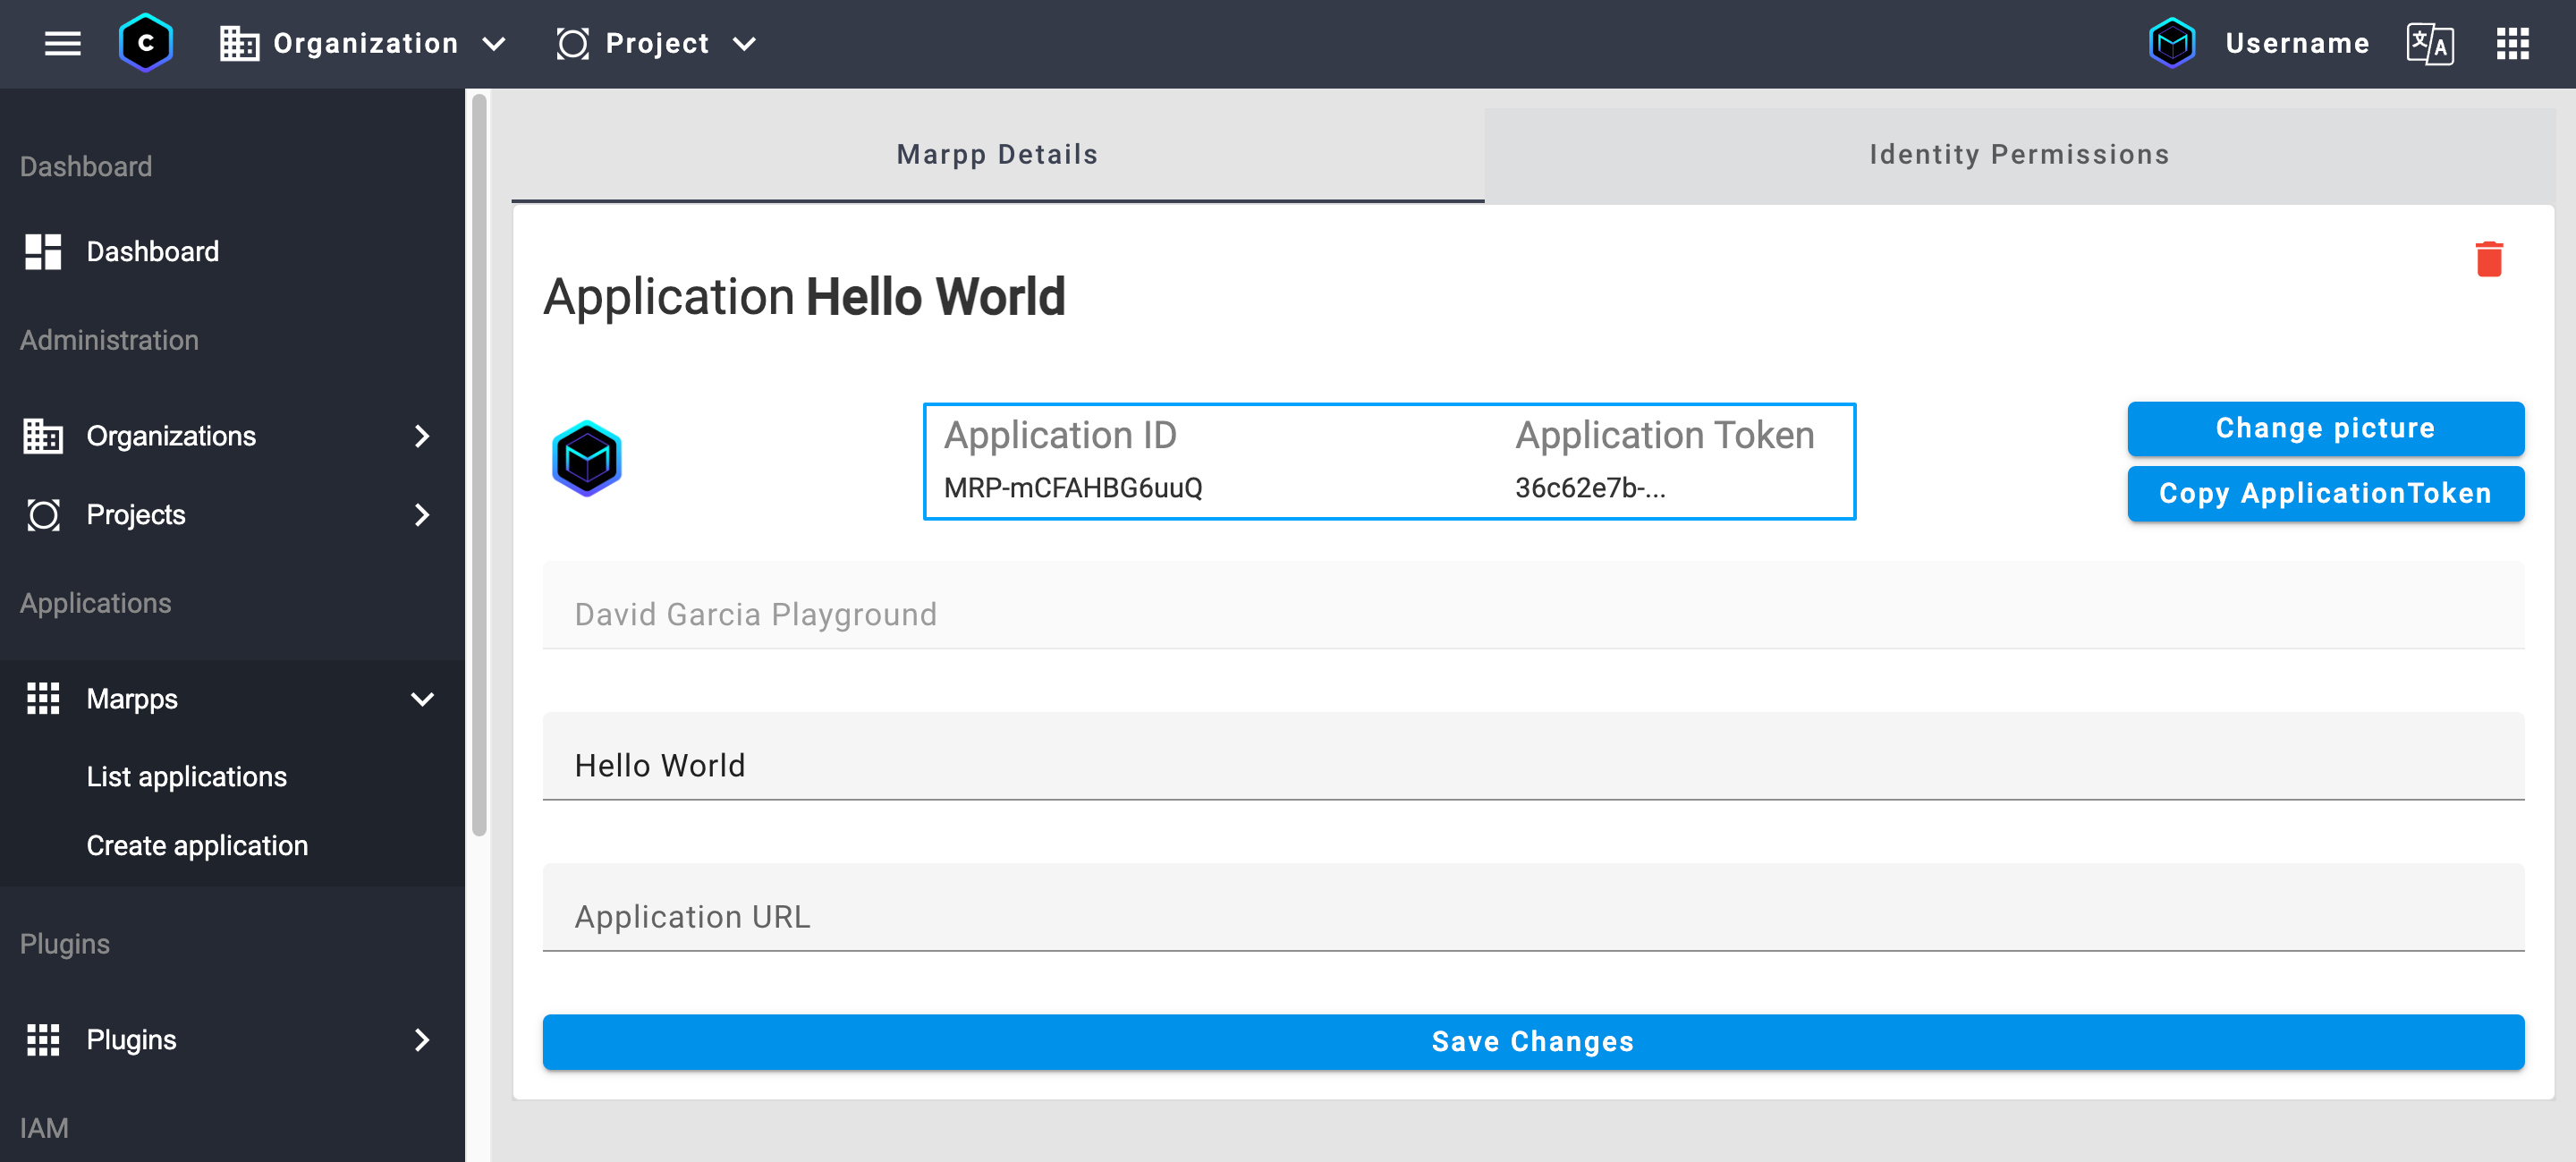
Copy and save the Application ID and Application Token:

You will use the application ID and token to reference your application in API requests.
2. Create a service account
Next, you need to register a service account, which authenticates your computer as an authorized user for API requests.
To create a service account, follow these steps:
On MARCO Console, go to IAM > Service accounts > Create account:

Set a name for the account.
Click Register Service Account.
dangerIt's crucial to keep service account credentials secret. Sharing these credentials can compromise the account and associated resources. If you suspect a service account has been compromised, you can deactivate it from the Service accounts section of the MARCO Console.
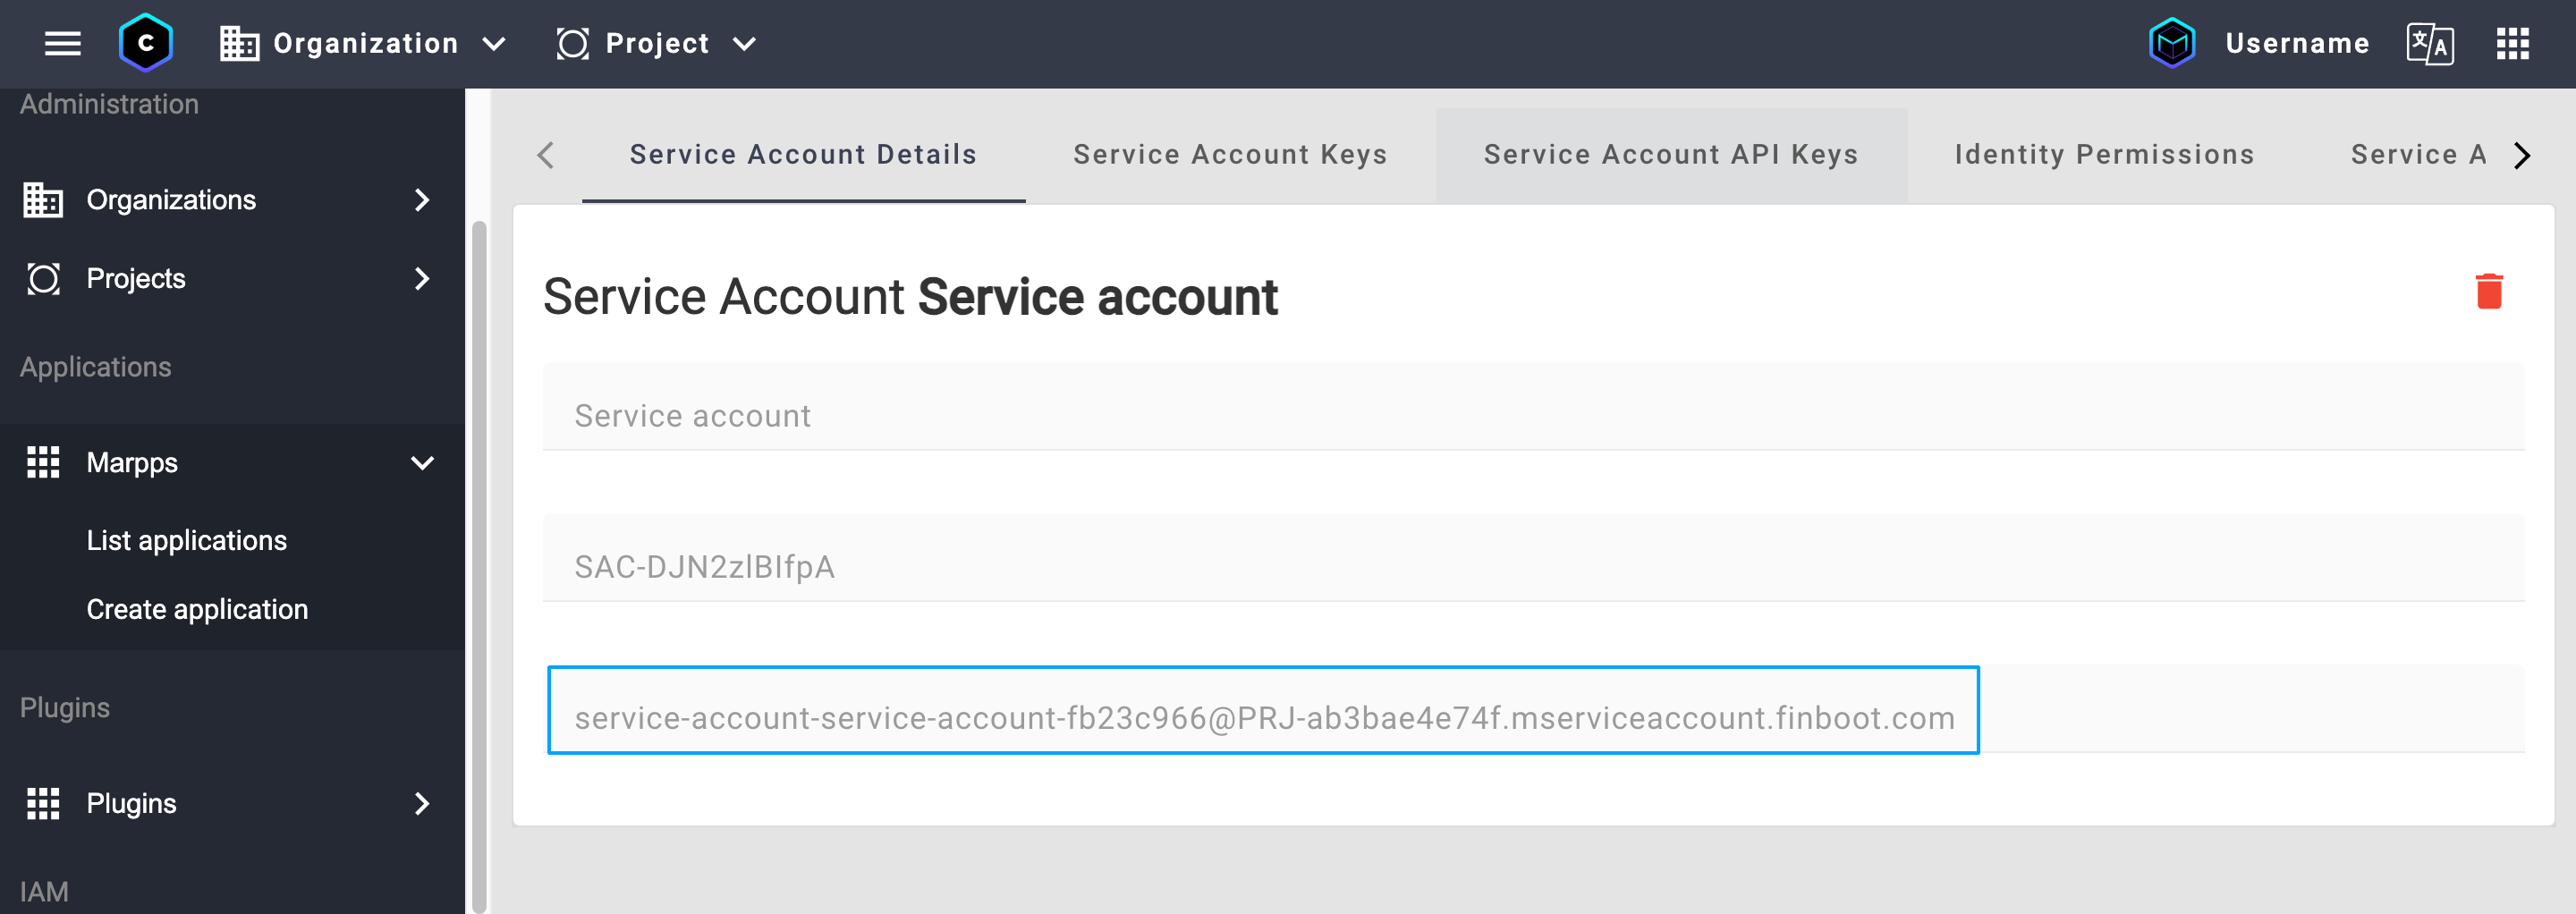
Copy and save the service account Email:

Open the Service Account API Keys tab.
Click Generate API Key.
Copy and save the service account API Token:

3. Grant permissions to the service account
To let the service account act on behalf of the application, follow these steps:
On MARCO Console, go to IAM > Service accounts > List accounts:
Select your service account.
Go to the Service Account Marpp Access Control tab.

In the Select Marpp field, choose your target Marpp.
Assign a role for the Marpp, such as
FULL_ACCESSor a more restrictive option. For more information, see Privileges.
4. Create an access token
Finally, you will generate an access token by combining your service account API key and application ID. This access token is required for most API calls and follows the bearer token authentication scheme.
To get an access token, follow these steps:
On a terminal window, run the following curl command:
curl -X POST "https://api-marco.finboot.com/v1/auth/token" \
    -H "Content-Type: application/x-www-form-urlencoded" \
    -d "client_id=<APPLICATION_ID>" \
    -d "client_secret=<API_TOKEN>" \
    -d "grant_type=client_credentials" \
    -d "service_account=<SERVICE_ACCOUNT_EMAIL>"
Replace
APPLICATION_ID,API_TOKEN, andSERVICE_ACCOUNT_EMAILwith the values you retrieved from previous steps.- Copy and save the
access_tokenvalue from the response:
{
    "access_token": "eyJra...w4lqw",
    "token_type": "Bearer",
    "expires_in": 299
}cautionThe access token has a lifespan of 300 seconds (5 minutes) To maintain uninterrupted use of the API, generate a new access token each time the current one expires.
- Copy and save the
Next steps
Great work! You now have an application, a service account, and an access token, ready to interact with the MARCO API. For more information on using the access token to authenticate API calls, see HTTP Requests.
To continue learning about MARCO, explore the following documentation:
- Concepts: Gain a deeper understanding of MARCO's architecture and main features.
- Guides: Learn how to use the MARCO Platform to build ledger agnostic applications.
- API Reference: Discover the REST APIs to integrate MARCO into your own applications and services.